
How Much Does Luxury Vinyl Plank Installation Cost in Southern NH & Northern MA?
How Much Does Luxury Vinyl Plank Installation Cost in Southern NH and Northern MA?
Wondering how much it’ll set you back to install
luxury vinyl plank (LVP) in Southern New Hampshire or Northern Massachusetts? You’re not alone. Around here, homeowners want to know what’s fair, what’s normal, and where all that money goes when hiring out a flooring project. This guide breaks it all down so you don’t get surprised by a final bill that’s higher than the kitchen ceiling.
We’ll walk through the real-world price ranges you can expect in our region—not some pie-in-the-sky internet averages, but numbers reflecting local labor, material prices, and all those little extras the big-box stores forget to mention. You’ll see how local conditions, installer expertise, and project size can swing costs up or down. If you want to budget smart for new LVP floors and avoid disappointment, you’re in the right place.
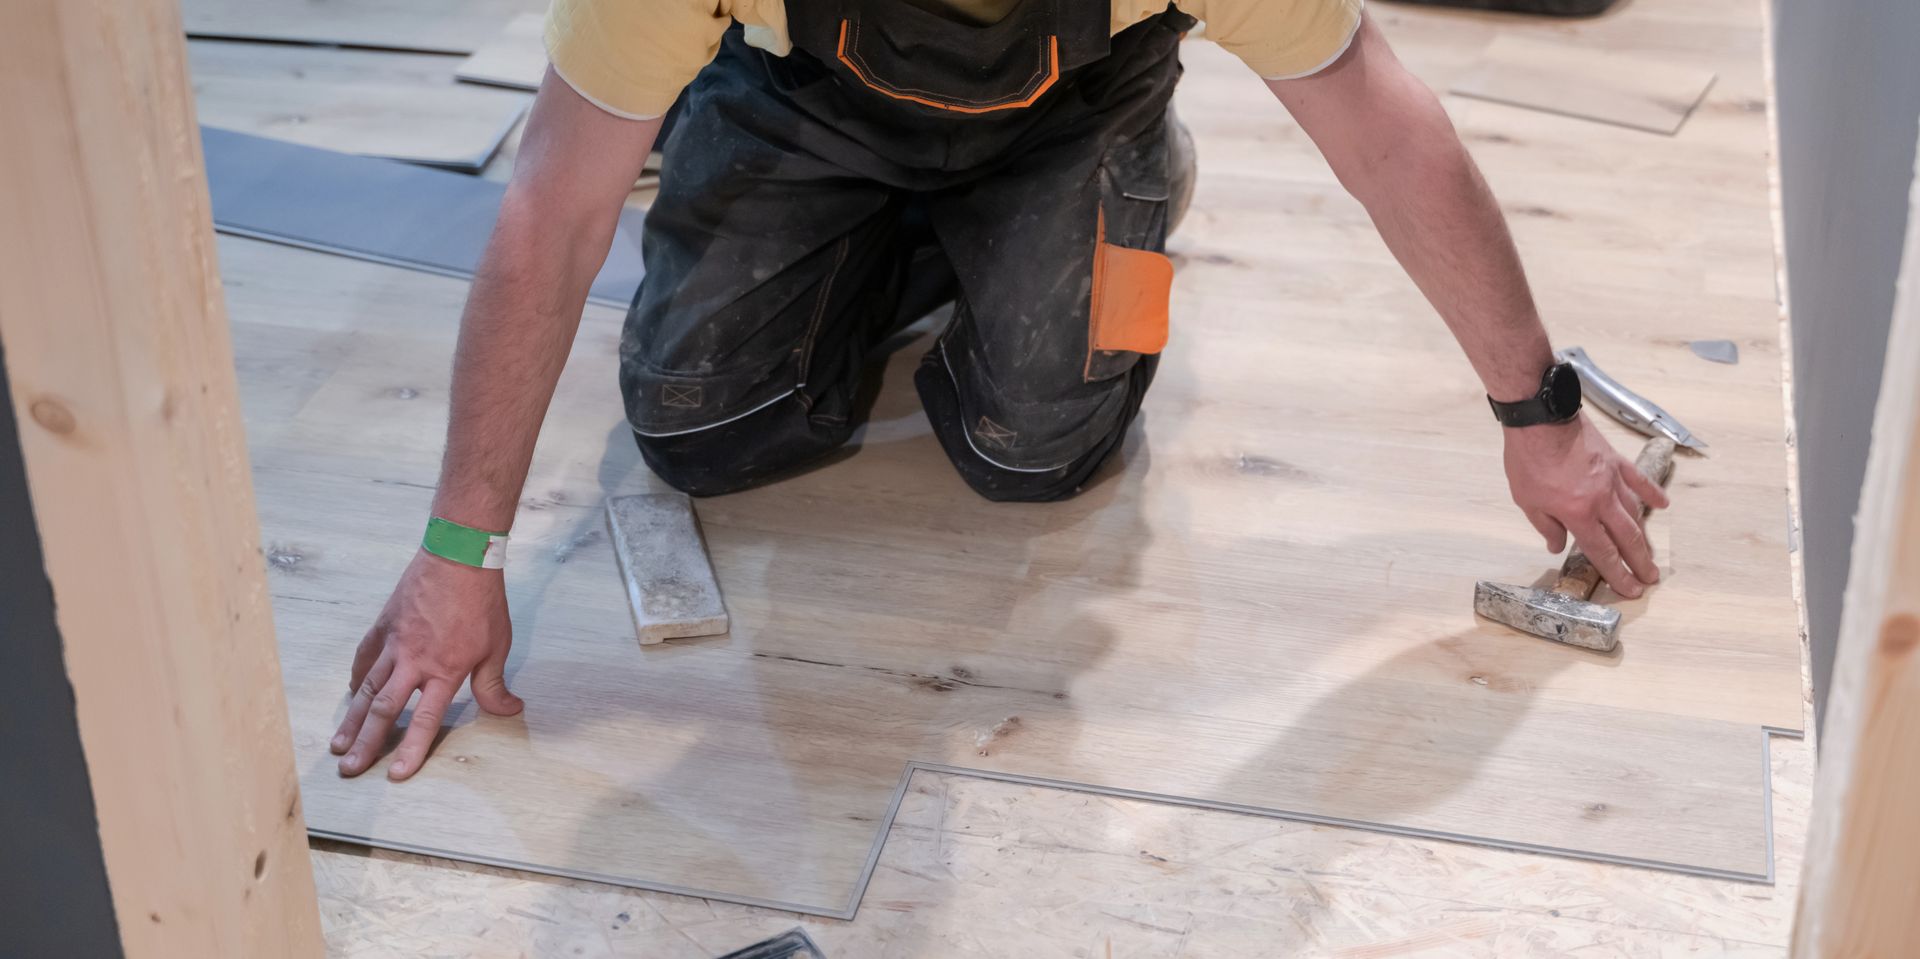
Understanding the Real Cost of Luxury Vinyl Plank Flooring Installation
When you’re budgeting for new luxury vinyl plank flooring, it’s not as simple as multiplying the price per square foot by your room size. The total cost wraps in several moving parts, including materials, labor, and preparation work. And, while national cost averages make a nice starting point, they’re only a slice of the real story for homes in Southern NH and Northern MA.
In this area, factors such as local labor rates, seasonal installer demand, and even the quirks of your home’s layout can send project costs above or below what you might expect from a quick Google search. It’s not just about what you buy—it’s about where, when, and how you install it.
We’re here to help you make sense of what drives these costs. From broad industry averages to the on-the-ground realities of getting good help around here, we’ll clarify what actually goes into those estimates. This way, you can compare material prices and labor bids with confidence—and avoid getting caught off guard when the invoice lands.
Let’s give you the clarity you need, so you can turn those cost breakdowns into a budget plan that works for your space and your wallet.
National Average Labor Costs for Luxury Vinyl Plank Installation
Across the United States, labor costs to install luxury vinyl plank usually range from $1.50 to $3.50 per square foot. According to data from Remodeling Magazine and the National Association of Home Builders, most homeowners find themselves quoted somewhere in this window, not including materials.
These national averages typically cover the basics: prepping the work area, installing the planks (whether floating or glued down), and a light cleanup. But keep in mind, special requests or extra prep—like removing stubborn old tile or correcting floor height differences—will push those numbers higher.
Region matters, too. In Southern NH and Northern MA, labor rates can lean closer to the high end of that range. Local pros may charge more due to higher costs of living, demand for skilled installers, or small-town travel time. It’s not uncommon for detailed, high-quality work in this area to see labor charges around $2.50–$4.00 per square foot, especially for complex floor plans or in high-season months.
Expert opinions and case studies show that while you might see deals below $2 per square foot, these are rare and often miss out on things like careful subfloor prep or precise finishing. Comparing your local quotes to these national averages can help you spot red flags—too cheap can mean corners are getting cut, which costs more in the long run.
How Luxury Vinyl Flooring Material Quality Affects Your Budget
Material quality is a huge driver of total project cost—sometimes as much as the labor itself. Entry-level luxury vinyl plank typically uses a thinner wear layer and a basic PVC core. These economical products can cost anywhere from $2.00 to $3.00 per square foot, but tend to scratch easier and may show wear sooner, especially in busy households.
On the other hand, mid-range to high-end LVP options come with a tougher wear layer (like 20 mil or thicker), advanced locking systems, and sometimes even a rigid stone-polymer core (SPC) or wood-polymer core (WPC). These upgrades do bump your material price up, often landing between $3.50 and $7.00 per square foot.
Design options—think realistic wood grains, wide planks, or special finishes—can also push prices higher. While the upfront sticker shock might sting, premium LVP’s durability and warranty coverage often stretch your investment further over time. Less replacement means lower long-term costs.
Overall, whether you want maximum bang for your buck or that head-turning premium look, understanding the trade-offs between price, build quality, and appearance helps you find the best material for your real-world needs and budget.
Factors That Influence Luxury Vinyl Plank Installation Pricing
If you’re trying to figure out why two similar LVP projects can end up with totally different price tags, this is where things get interesting. While materials and basic labor are the starting blocks, several other elements come into play—some obvious, some that tend to sneak up on you.
There’s more to it than just how big your room is. The shape of your space, how many nooks or tricky edges there are, what’s going on underneath the old floor, and which installation method fits your home—these all feed into your estimate. Homeowners around Southern NH and Northern MA know that every house has its own personality quirks that can steer project costs one way or another.
These factors are why two neighbors with similar homes might get wildly different quotes. As we dive into the details ahead, you’ll see how understanding these variables brings control to your flooring budget and helps you spot where extra costs might be hiding.
Knowing what influences the price sets you up to ask better questions, plan for the “just in case” expenses, and ultimately get the look you want without blowing the budget.
Room Size, Layout, and Project Estimates for Every Space
- Room square footage: The most straightforward cost driver is the size of your space. Most installers quote LVP by the square foot, so living rooms (often 200–400 sq. ft.) will cost more than a smaller bedroom (about 120–180 sq. ft.), just based on the material and labor needed to cover the area.
- Room shape and obstacles: Simple, rectangular rooms are quick and cheaper to install—less cutting, less material waste. More complex layouts, like L-shaped basements or open-concept areas, require extra time for measuring, cutting planks to fit corners, or working around built-ins and closets. This can add 10–20% to your labor costs.
- Project estimate examples: Expect to pay $500–$1,000 for a modest guest bedroom, while a main floor spanning several rooms could total $2,000–$5,000 or more when you factor in material and install. Open plans with large kitchens, hallways, or multiple transitions cost more due to extra prep and detailed finish work.
- Material overage and waste: Professional installers recommend adding 5–10% extra material beyond your measured square footage. Irregular rooms, diagonal plank patterns, or custom borders use more material, so always plan for this in your estimate.
The takeaway? Every curve, doorframe, and weird closet bump-out adds a challenge. By understanding how your room’s size and shape affect costs, you’ll set a realistic budget and avoid short-order sticker shock.
Why Subfloor Prep and Old Flooring Removal Change Your Quote
The state of your subfloor and what’s already covering it can throw a curveball at your LVP project budget. Before new planks go down, the installer must make sure the surface underneath is flat, clean, and dry. Common prep steps include sweeping, patching cracks, filling holes, and sometimes even grinding down old glue or high spots.
If your old flooring is stubborn—like glued-down carpet or ancient linoleum—removing and disposing of it can add both time and disposal fees. Some pros lump this into the overall estimate, while others list it as a separate line item. In Southern NH and Northern MA, you might see removal fees of $1–$2 per square foot or flat charges for hauling away bulky debris.
Don’t forget about the hidden surprises. Sometimes, installers discover subfloor issues like water damage, rot, or an unlevel slab. Fixing these can mean unexpected repair bills, with leveling and patching sometimes costing $100–$400 or more per room. Moisture barriers or special coatings can also be a required expense if your floor is over a concrete slab or prone to dampness.
These prep costs aren’t glamorous, but skipping them can lead to shifting, squeaks, or planks that pull apart. Knowing about them in advance helps you set an accurate budget and avoid costly floors that don’t stay flat for long.
Installation Methods and How They Impact Labor Costs
- Click-lock floating floor: This popular DIY-friendly method involves snapping planks together over the subfloor, with no need for glue or staples. Labor costs are typically lower ($1.50–$2.50/sq. ft.), and installation moves quickly in standard rooms. Floating floors are forgiving, but challenging spaces or large areas may still require professional help.
- Glue-down installation: Installers use special adhesive to secure each plank directly to the subfloor. It’s more permanent, less likely to shift under heavy furniture, and often chosen for commercial spaces or high-traffic rooms. The labor bill goes up ($2.50–$4.00/sq. ft.) since spreading glue and laying planks takes more time and skill—especially on uneven surfaces.
- Loose lay installation: Certain thick, heavy luxury vinyl planks can be set directly on a super-flat subfloor or slab with minimal fasteners or adhesive. This is rare in homes but can make for the fastest—and sometimes least expensive—labor charges, though the options are limited.
- Special patterns and extras: Diagonal installation, intricate borders, stairways, or mixed materials always bump up labor costs. These details take precision and extra hours, whether you’re hiring a pro or spending your own weekends knee-deep in planks.
Choosing the right installation method doesn’t just affect your wallet—it impacts how your floor will feel, flex, and last for years to come.
DIY or Professional Installation for Luxury Vinyl Floors
When it comes to installing luxury vinyl plank flooring, one big question pops up: do we want to tackle it ourselves or hire a pro? The cost difference is tempting—DIY usually promises a lower upfront price. But there are some hidden traps and trade-offs lurking beneath that smooth vinyl surface.
This section sets up the key differences in cost, quality, and risk between a DIY approach and calling in a seasoned installer. We’ll walk through the biggest pros and cons, like how much you might save, what mistakes can end up costing you double, and when expert skills outshine a weekend warrior’s best efforts.
Whichever route you lean toward, the upcoming details will show you where the real savings lie—and what shortcuts could leave you with a wobbly floor or regret down the road. This way, you can make a choice that fits not just your budget, but your timeline, skill level, and long-term satisfaction with your home.
Weighing DIY Installation Cost Savings Against Hidden Risks
- Tool savings and up-front costs: DIY installation usually skips professional labor charges. But there’s a catch—tools add up. You’ll need a sharp utility knife, tapping block, spacers, a saw, measuring tape, and possibly a moisture meter. Expect to spend $50–$250 on gear if you don’t already own the basics.
- Time investment: Laying LVP isn’t rocket science, but it’s definitely a time-eater for first-timers. A simple bedroom could take a day or weekend, but whole-house jobs can drag out for weeks, especially if you discover surprises under old flooring.
- Common DIY slip-ups: The biggest risks come from rookie mistakes—misaligned seams, missed expansion gaps, or skimping on subfloor prep. These can lead to peaking planks or bouncy spots that need costly repairs later. Fixing a badly laid floor may double your expenses.
- Warranty headaches: Many flooring warranties specify pro installation for coverage. DIY may void your material warranty, leaving you on the hook if defects show up.
- When DIY makes sense: If you have handy experience, simple room shapes, and patience, DIY can save you $1–$3 per square foot. If not, you might save money up front, only to pay with headaches and repair bills after.
Be realistic: DIY can be rewarding (and cheaper) for small, standard rooms, but gets risky fast in large, funky-shaped, or high-traffic spaces.
When Hiring Professionals Is Worth the Cost
- Large or open spaces: Wide spans, big living rooms, or multi-room jobs are faster and more consistent with a pro’s expertise (and crew).
- Tricky layouts and high-traffic areas: Professionals handle complex corners, tight thresholds, and creative patterns with ease—reducing the risk of mistakes that can cost you in the long term.
- Subfloor issues: If your home has history (and quirks), pros can spot and fix hidden problems quickly, sparing you major headaches.
- Warranty peace of mind: Hiring certified installers often extends your floor’s manufacturer warranty—plus you may get a labor guarantee, like a 5-year promise from some top local companies.
- How to find a good pro: Look for installers with strong reviews, local references, up-to-date insurance, and clear contracts. A small premium for dependable expertise can save a mountain of trouble.
Sometimes, the best way to save is to pay a little more up front for professional results that last for years.
How to Pick the Right Luxury Vinyl Plank for Your Budget
Choosing the right luxury vinyl plank isn’t just about color or pattern—it’s also about balancing cost, durability, and style to match your day-to-day life. With so many brands, wear layers, and fancy features out there, it can feel a bit like shopping for a car without knowing the difference between base and fully loaded.
Luckily, LVP comes in several different tiers, each offering its own level of quality, toughness, and price. Understanding these options helps you avoid overpaying for features you don’t need, or worse, skimping on durability in busy rooms.
Up next, we’ll break down how to compare LVP from standard to premium, plus see how it stacks up cost-wise against hardwood and tile. Armed with this info, you’ll be able to pick a product that holds up, looks the way you want, and fits your budget—for the long haul.
Comparing LVP Tiers from Budget to Premium Enhanced Options
- Entry-level LVP: Expect thin wear layers (6–8 mil), basic click-lock or peel-and-stick setups, and a short lifespan (5–10 years in light-traffic rooms). It’s the cheapest—$2–$3/sq. ft.—but best for guest rooms, light-use areas, or selling a home on a budget.
- Mid-range LVP: Here you get a thicker, more durable wear layer (12–20 mil), realistic wood visuals, and often an SPC (stone-polymer composite) or WPC (wood-polymer composite) core. These products handle daily wear, resist dents and moisture, and last 10–20 years in a typical home for around $3.50–$5/sq. ft.
- High-end (enhanced) LVP: Premium lines boast super-thick wear layers (20–30+ mil), ultra-realistic textures, anti-microbial coatings, and long warranties. These are tough enough for commercial settings and loud kids or pets. Expect up to 25+ years with material costs from $5–$7+ per square foot.
- What you get for the price: Enhanced LVP costs more, but saves on repairs, looks better longer, and usually qualifies for better labor and material warranties. If you want a showpiece floor or zero headaches, premium pays off.
By knowing the differences, you can pick the right mix of price and performance for your space, traffic level, and plans to stay in your home.
Is Luxury Vinyl Plank Cheaper Than Hardwood or Tile Floors?
Luxury vinyl plank almost always beats hardwood or ceramic tile on upfront installation cost. LVP, including labor, usually runs $4–$9 per square foot. Real hardwood often falls between $8–$15+, while ceramic tile can cost $10–$20 or more per square foot installed.
LVP’s edge doesn’t stop there. It avoids many of the regular maintenance and repair costs tied to wood and grout, and its longer life between replacements means genuine long-term savings for most families—all while delivering those high-end looks you’re after.
Best Tools and Resources for Estimating Luxury Vinyl Plank Costs
Nailing down an accurate budget for your LVP project is much easier these days, thanks to reliable online calculators and some basic room measurement know-how. An informed estimate lets you plan smart, order the right amount of materials, and avoid those last-minute calls back to the store—or surprise upcharges on installation day.
This section introduces some of the best ways to estimate total project costs, showing you how technology and a tape measure can cut through the guesswork. Next, we’ll walk through the specific tools and steps so you can create a budget that’s as solid as your soon-to-be new floors.
Ready to take charge of your project’s numbers? Let’s see how to get the most from digital calculators and precision measuring, ensuring you stay on budget and eliminate surprises.
Using a Luxury Vinyl Plank Cost Calculator to Plan Your Project
- Input your square footage: Start by entering the length and width of each room into the calculator. For multi-room projects, include those areas for an overall total—this is the backbone of your cost estimate.
- Select material quality: Many calculators let you choose between standard, mid-tier, and premium LVP. Don’t forget to include the type of core and wear layer, as premium options may double the material cost.
- Pick your installation method: Enter whether you’ll use click-lock floating, glue-down, or loose lay. The method you choose impacts labor costs, with glue-down typically running highest.
- Factor in extras: Add options for subfloor prep, removal of old flooring, underlayment, trims, and even furniture moving. The more info you plug in, the more accurate your estimated total.
- Review and compare: Use the final number as a baseline. Get firm quotes from local pros before pulling the trigger—calculators are a guide, not gospel, but they save a ton of time and guesswork.
With a quality calculator and your project details in hand, you’ll have a ballpark figure to help negotiate, order materials, and prevent budget blowouts.
Step-by-Step Guide to Measuring Your Room for Precise Estimates
- Measure each wall: Write down the length and width of your room, rounding up to the nearest half-foot to allow for wiggle room and errors.
- Multiply for square footage: Multiply length by width to get your room’s square footage. For more than one room, repeat and add totals together.
- Don’t forget the obstacles: If your room isn’t perfectly square, break it into rectangles, measure each section, and sum them up. Include closets, alcoves, and hallways if they’ll be getting new flooring too.
- Add waste and overage: Professionals recommend tacking on 5–10% more to your measurement. This accounts for cuts, pattern matching, and the occasional “oops.”
By measuring ahead of time, you’ll know exactly how much to order and can avoid costly, last-minute trips for extra planks.
Money-Saving Tips and Red Flags to Avoid for Your Flooring Project
No one likes paying more than they have to for new floors—especially when every dollar counts and flooring mistakes can get expensive fast. This section tees you up with actionable tips to bring down your LVP installation costs without skimping on results, plus some telltale warning signs to help you dodge unreliable contractors.
Homeowners in Southern NH and Northern MA, these next parts will arm you with smart shopping strategies and proven cost-cutting moves, while giving you the confidence to spot a bad deal or a shoddy installer before it’s too late.
Stick around for practical, field-tested ways to keep cash in your pocket and quality under your own roof.
Smart Money-Saving Tips to Reduce Your Flooring Project Costs
- Shop sales and off-season deals: Flooring retailers and installers often run sales at the end of winter or in late fall when business is slower. Scheduling your project during these times can score you significant discounts on both materials and labor.
- Bundle your services: Ask your installer about combined deals for subfloor prep, removal, and install. Bundling multiple services with one contractor usually knocks down the overall price per square foot.
- Buy in bulk or larger boxes: If you have a lot of square footage to cover, purchasing planks by the carton or even pallet can leverage lower unit pricing. Leftovers don’t go to waste—they’re handy for future repairs.
- Consider mid-range materials: Instead of always reaching for the priciest planks, compare product performance ratings and warranties. Sometimes a solid mid-tier LVP offers the same look and lifespan as a top-tier line, for less.
- Prep ahead of the installer: If you’re comfortable, move furniture and remove baseboards yourself before the crew arrives. Sometimes this shaves hours off their labor, saving you dollars on the final bill.
- Get (and compare) multiple quotes: Don’t settle for the first number you hear. Get at least three local bids and read the fine print so you’re comparing apples to apples.
Every little bit helps. Stack up several of these tactics, and you’ll see real savings—without sacrificing the results you deserve.
Red Flags to Watch When Hiring Flooring Professionals
- Vague or incomplete contracts: If the installer can’t spell out every task, charge, and timeline, that’s a red flag. Clear contracts protect both sides.
- Unusually low bids: A bid that’s much lower than others often means shortcuts are coming, whether in prep work, materials, or crew experience.
- No proof of insurance or licensing: Always ask for documentation. Good installers carry active insurance and any licenses required locally.
- Lack of references or poor reviews: Reputable pros are happy to connect you with recent clients. No references, no deal.
- Pushy sales tactics: A trustworthy contractor lets you make decisions at your pace and never pressures you to sign right away.
Keep your eyes open and trust your instincts—when you see these warning signs, walk away before you end up with a costly mess.
Frequently Asked Questions About Luxury Vinyl Plank Installation Cost
Throughout the process of choosing and installing luxury vinyl plank flooring, a few questions pop up over and over again: How much should you actually budget? How long will your home be in disarray? And is this shiny, wood-look floor really as good as everyone says?
This final section answers the big ones—everything from cost basics to timelines and long-term value. Our aim is to clear up common myths, set realistic expectations, and show you how to get the most out of your flooring investment in Southern NH and Northern MA.
Use these FAQs as your go-to resource for peace of mind, whether you’re planning your first project or double-checking what a contractor tells you. We’ve got answers to keep your budget and your sanity intact.
How Much Should I Budget for LVP Flooring in My Home?
For most homes in Southern NH and Northern MA, you’ll want to budget between $4 and $9 per square foot installed. This covers everything—mid-range to premium material, labor, and basic subfloor prep. For a single 200-square-foot room, that’s $800–$1,800. Larger spaces (like a whole main floor) can total $5,000–$10,000 or more, depending on size and material choice.
Your final cost depends mostly on three things: the quality of LVP you pick, how much prep work is involved, and which installation method you choose. Premium planks and glue-down installs skew higher. If your subfloor is in rough shape or old floors need removal, tack on extra for repairs and disposal.
The smart money? Get three detailed quotes from local pros and ask them to break out the costs—so you can see where your dollars are going, compare apples to apples, and negotiate with confidence.
Set aside a small contingency fund (roughly 10% extra) to cover any unexpected surprises, like leveling or moisture barrier requirements, and you’ll avoid mid-project sticker shock.
How Long Does Luxury Vinyl Flooring Installation Take?
Most single-room LVP installations in our region can be finished in a day—sometimes even half a day if the subfloor is ready and there aren’t many odd angles. For whole-home jobs or large open areas, expect one to three days, depending on surface prep, floor plan complexity, and whether old flooring needs to go first.
Keep in mind: moisture barriers or special leveling products may add a day or two for curing. Busy seasons—especially spring and fall—might also mean waiting a bit longer for the region’s best installation crews to fit you in.
All told, the disruption is pretty minimal—most families find LVP projects are among the fastest (and least intrusive) home makeovers out there.
Is Luxury Vinyl Flooring Worth the Cost Versus Other Options?
Luxury vinyl plank is one of the best values in flooring. It can mimic the look of hardwood or tile at a fraction of the installation price. LVP offers excellent durability, is easy to keep clean, and rarely needs expensive repairs. Most products last 15 to 25 years—often longer with good care.
LVP delivers strong resale value, especially in today’s market, where buyers love low-maintenance flooring. Add in the quick installation and affordable upkeep, and it’s an investment that pays for itself by combining style, function, and long-term savings.